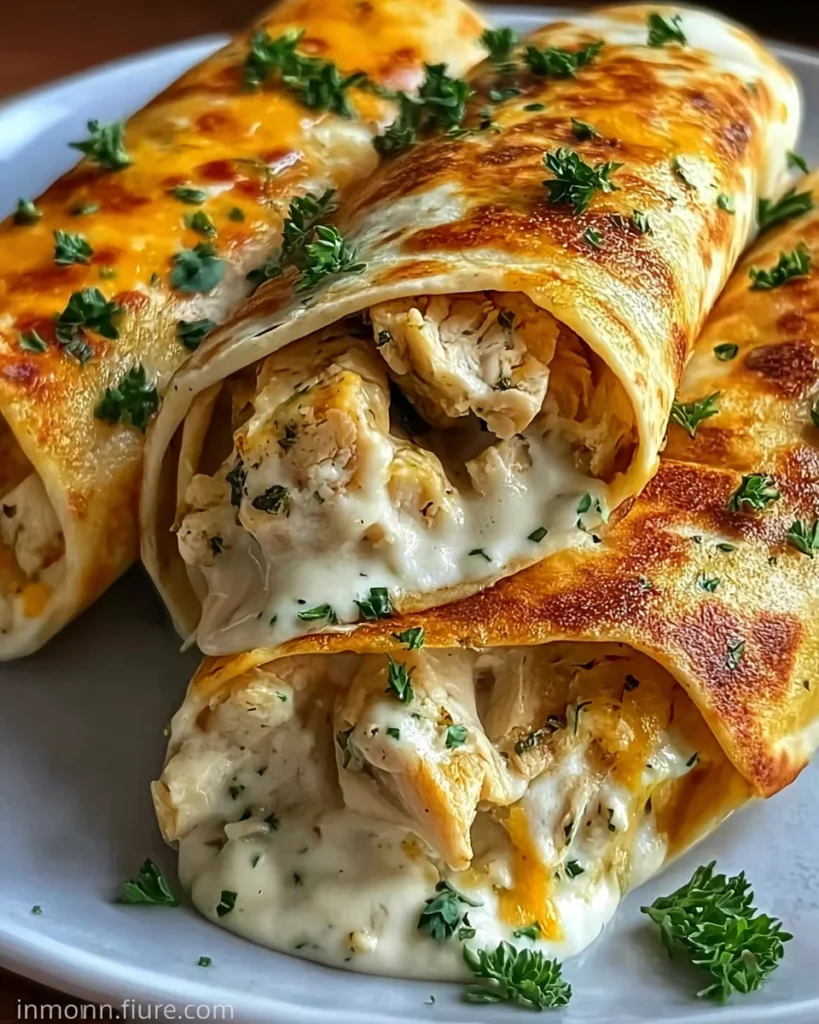
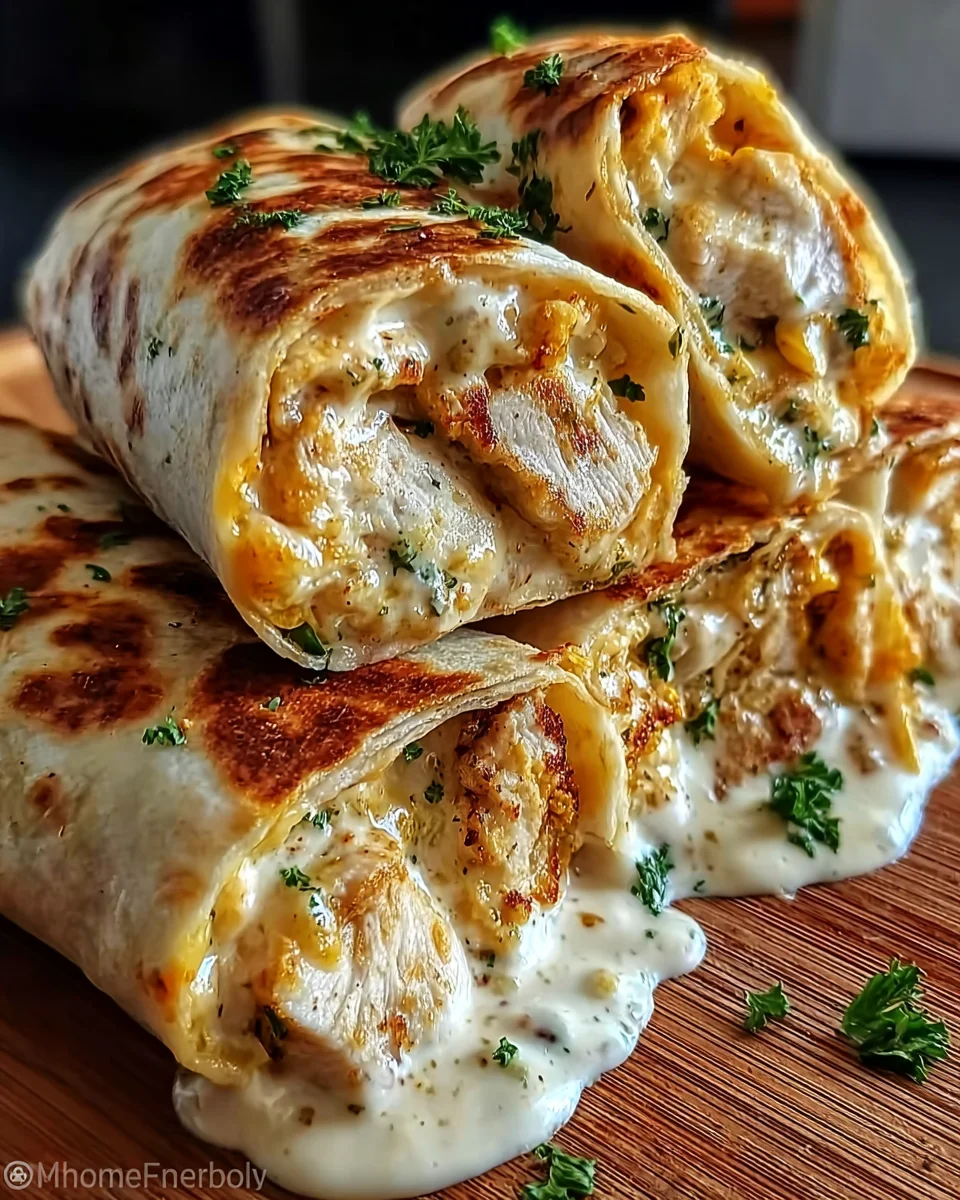
Golden chicken wrapped in crispy tortillas with melted cheese and creamy garlic sauce makes these Cheesy Chicken Garlic Wraps a delightful dish for any occasion. Whether you’re preparing a quick dinner for your family or hosting friends for game night, these wraps are sure to impress. They combine flavors and textures that appeal to everyone, making them a must-try recipe. Plus, they are quick to make, coming together in just 25 minutes!
Why You’ll Love This Recipe
- Quick and Easy: This recipe takes only 25 minutes from start to finish, perfect for busy weeknights.
- Flavor Packed: The combination of melted cheeses and creamy garlic sauce elevates simple chicken to a whole new level.
- Versatile Meal Option: These wraps can be customized with your favorite veggies or sauces, making them suitable for various tastes.
- Kid-Friendly: The cheesy goodness and fun wraps make this dish appealing to kids and adults alike.
- Great for Leftovers: Enjoy them the next day! These wraps hold up well in the fridge.
Tools and Preparation
Before you begin making your Cheesy Chicken Garlic Wraps, gather your tools. Having the right equipment will help streamline the cooking process.
Essential Tools and Equipment
- Non-stick pan
- Mixing bowl
- Spatula
- Knife
Importance of Each Tool
- Non-stick pan: Ideal for even cooking without sticking, ensuring your wraps turn out perfectly golden.
- Mixing bowl: Essential for marinating the chicken with spices evenly before cooking.
Ingredients
Golden chicken wrapped in crispy tortillas with melted cheese and creamy garlic sauce. Ready in 25 minutes for an easy meal.
For the Chicken Filling
- 2 large chicken breasts, diced
- 1 tablespoon olive oil
- 2 teaspoons garlic powder
- 1 teaspoon onion powder
- 1 teaspoon paprika
- Salt and pepper, to taste
For the Wrap
- 4 large flour tortillas
- 1 cup shredded cheddar cheese
- 1/2 cup shredded mozzarella cheese
- 1/2 cup creamy garlic sauce
- Fresh parsley, chopped
How to Make Cheesy Chicken Garlic Wraps
Step 1: Prepare the Chicken
In a bowl, combine the diced chicken with olive oil, garlic powder, onion powder, paprika, salt, and pepper. Ensure that the chicken is evenly coated with all the seasonings.
Step 2: Cook the Chicken
Heat a non-stick pan over medium heat. Add the seasoned chicken to the pan:
1. Cook for about 6-8 minutes.
2. Stir occasionally until the chicken is golden brown and fully cooked through.
3. Remove from heat and let it cool slightly.
Step 3: Assemble the Wraps
Lay out the tortillas on a flat surface:
1. Spread a layer of creamy garlic sauce over each tortilla.
2. Evenly distribute the cooked chicken on top of each tortilla.
3. Sprinkle both shredded cheddar and mozzarella cheese over the filling.
Step 4: Grill the Wraps
Fold each tortilla over its filling to create a wrap:
1. In the same non-stick pan, grill each folded wrap for about 2-3 minutes on each side.
2. Cook until the cheese is melted and tortillas are golden and crispy.
Step 5: Serve
Remove from the pan:
1. Cut each wrap in half.
2. Garnish with freshly chopped parsley if desired.
3. Serve immediately for best flavor!
Enjoy these delicious Cheesy Chicken Garlic Wraps as a simple yet satisfying meal!
How to Serve Cheesy Chicken Garlic Wraps
Cheesy Chicken Garlic Wraps are versatile and can be enjoyed in many delightful ways. Whether you’re hosting a casual meal or looking for a quick lunch, these wraps can be customized to suit your taste.
With Fresh Salad
- A light salad with mixed greens and a zesty vinaigrette complements the richness of the wraps perfectly.
Paired with Dips
- Serve with additional creamy garlic sauce or spicy salsa for an extra kick, making each bite even more flavorful.
On a Platter
- Arrange the wraps on a large platter for a fun sharing experience. Garnish with parsley for added color and freshness.
Wrapped for Lunch
- These wraps make excellent leftovers! Pack them in lunchboxes for a satisfying meal on the go.
With Pickles or Olives
- Adding pickles or olives on the side provides a nice contrast to the cheesy chicken’s creaminess.

How to Perfect Cheesy Chicken Garlic Wraps
To make your Cheesy Chicken Garlic Wraps even better, consider these helpful tips that will elevate your dish.
- Use Fresh Ingredients: Fresh chicken and high-quality cheese enhance flavor and texture.
- Experiment with Spices: Feel free to adjust the spices according to your preference; adding chili powder can introduce some heat.
- Don’t Overfill: Ensure you don’t overstuff your wraps; this will make them difficult to grill and eat.
- Preheat Your Pan: Make sure your non-stick pan is properly heated before grilling for optimal crispiness.
Best Side Dishes for Cheesy Chicken Garlic Wraps
Pairing sides with Cheesy Chicken Garlic Wraps can enhance your meal experience. Here are some delicious options:
- Guacamole – Creamy avocado dip that pairs well with the wrap’s flavors; simply mash avocados, lime juice, and salt together.
- Coleslaw – A crunchy slaw adds freshness; mix cabbage, carrots, mayo, and vinegar for a quick side.
- Corn on the Cob – Sweet corn grilled or boiled complements the savory wrap wonderfully; serve with butter and seasoning.
- Sweet Potato Fries – Crispy sweet potato fries offer a sweet contrast; toss cut potatoes in olive oil and bake until golden.
- Roasted Vegetables – Seasonal veggies roasted with olive oil bring color and nutrients; choose bell peppers, zucchini, or asparagus.
- Potato Salad – A creamy potato salad balances out the meal; mix boiled potatoes, mayo, mustard, and herbs for flavor.
Common Mistakes to Avoid
When making Cheesy Chicken Garlic Wraps, even small errors can affect the final dish. Here are some common mistakes and how to avoid them.
- Skipping the seasoning – Failing to season your chicken properly can lead to bland wraps. Always ensure you coat the chicken with olive oil and spices for maximum flavor.
- Using cold tortillas – Cold tortillas can tear when folding. Warm them slightly before assembly to make them pliable and easier to wrap.
- Overstuffing the wraps – Adding too much filling can cause spills during cooking. Stick to a moderate amount of chicken and cheese for easy grilling.
- Not letting the chicken rest – Cutting into hot chicken immediately can result in dry meat. Allow it to cool slightly after cooking for juicier bites.
- Grilling at too high a heat – Cooking wraps on high heat may burn the tortillas before the cheese melts. Use medium heat for an even, golden brown finish.
Storage & Reheating Instructions
Refrigerator Storage
- Store leftover wraps in an airtight container.
- They can be kept in the fridge for up to 3 days.
Freezing Cheesy Chicken Garlic Wraps
- Wrap each individual wrap tightly in plastic wrap or aluminum foil.
- Place them in a freezer-safe bag or container; they can last up to 3 months.
Reheating Cheesy Chicken Garlic Wraps
- Oven – Preheat your oven to 350°F (175°C). Place wraps on a baking sheet and heat for about 10-15 minutes until warmed through.
- Microwave – Place on a microwave-safe plate and cover with a damp paper towel. Heat for 1-2 minutes, checking periodically.
- Stovetop – Reheat in a non-stick pan over medium-low heat for about 3-5 minutes on each side until crispy.
Frequently Asked Questions
Here are some common questions about Cheesy Chicken Garlic Wraps that might help you perfect your dish.
Can I customize my Cheesy Chicken Garlic Wraps?
Yes! You can add vegetables like bell peppers or spinach for added nutrition and flavor.
What is the best way to serve Cheesy Chicken Garlic Wraps?
These wraps are best served warm as part of a quick dinner or lunch. Pair them with a fresh salad or dipping sauce.
How long do Cheesy Chicken Garlic Wraps last?
When stored properly, they last up to 3 days in the refrigerator and up to 3 months in the freezer.
Can I use other types of cheese?
Absolutely! Feel free to experiment with different cheeses like pepper jack or gouda for unique flavors.
Final Thoughts
Cheesy Chicken Garlic Wraps are not only quick and easy but also incredibly versatile. You can customize them based on your preferences, making them suitable for any occasion. Give this recipe a try, and enjoy all the cheesy goodness wrapped up in one delicious meal!
Cheesy Chicken Garlic Wraps

Cheesy Chicken Garlic Wraps are the ultimate quick and satisfying meal, ready in just 25 minutes! These delectable wraps feature golden, seasoned chicken enveloped in crispy tortillas, generously layered with melted cheddar and mozzarella cheese, and drizzled with a rich creamy garlic sauce.
- Prep Time: 10 minutes
- Cook Time: 15 minutes
- Total Time: 25 minutes
- Yield: Serves 4
- Category: Dinner
- Method: Grilling
- Cuisine: American
Ingredients
- 2 large chicken breasts, diced
- 1 tablespoon olive oil
- 4 large flour tortillas
- 1 cup shredded cheddar cheese
- 1/2 cup shredded mozzarella cheese
- 1/2 cup creamy garlic sauce
- 2 teaspoons garlic powder
- 1 teaspoon onion powder
- 1 teaspoon paprika
- Salt and pepper, to taste
Instructions
- In a bowl, mix diced chicken with olive oil and spices until evenly coated.
- Heat a non-stick pan over medium heat and cook the chicken for 6-8 minutes until golden brown. Let cool slightly.
- Lay tortillas flat and spread creamy garlic sauce on each.
- Distribute cooked chicken evenly on tortillas and sprinkle cheese on top.
- Fold each tortilla into a wrap and grill in the non-stick pan for 2-3 minutes per side until crispy and cheese is melted.
- Cut wraps in half, garnish with parsley if desired, and serve warm.
Nutrition
- Serving Size: 1 wrap (200g)
- Calories: 550
- Sugar: 2g
- Sodium: 980mg
- Fat: 28g
- Saturated Fat: 10g
- Unsaturated Fat: 16g
- Trans Fat: 0g
- Carbohydrates: 48g
- Fiber: 3g
- Protein: 34g
- Cholesterol: 80mg